10 Mistakes Toronto Homeowners Make When Ordering Custom Doors

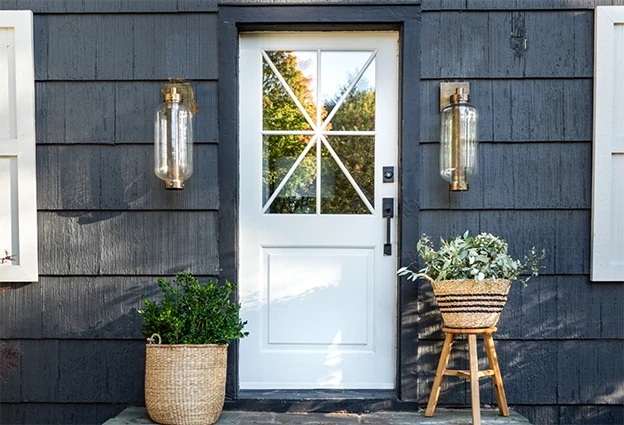
Toronto weather is tough. Winters freeze. Summers heat up. Wind and rain hit many entries. A custom door solves fit and style. It also improves comfort and security. But small mistakes can add cost and delay. I will show you what to avoid. I will keep it simple. I will explain terms as we go.
Custom means the door is built for your opening. It is measured on site. It arrives pre-hung with the right frame and sill. It seals well. It swings clean. It looks right from the street. When you plan it well, the process is smooth. When you do not, the budget and timeline can slip.
Mistake 1: Treating custom like stock
A stock door uses a “close enough” size. A custom door uses your size. That difference matters. A tight fit reduces drafts and noise. It also helps the lock latch cleanly.
What goes wrong when you treat custom like stock:
You order by rough size from an old drawing.
You skip the in-home measure.
You guess the swing and hinge side.
What to do instead:
Book a site measure before you sign.
Confirm swing (inswing or outswing) and handing (left or right).
Check the subfloor height and any planned flooring changes.
Ask for a pre-hung unit with composite frame and adjustable sill.
Why this matters in Toronto:
Frames move with freeze and thaw.
A precise fit keeps the weatherstrip engaged.
A better seal lowers heat loss and street noise.
Mistake 2: Choosing the wrong material for the exposure
Not all entries face the same conditions. West sun can bake a dark door. North wind can drive rain at the sill. Material choice should match exposure.
Simple rules that work:
Fiberglass for stability and insulation. It resists warping. It handles freeze-thaw well. It is ideal for harsh exposures.
Steel for a clean, modern look and strong skins. It needs paint touch-ups if chipped. Choose lighter colours for west-facing entries.
Wood accents for warmth and character. Use them with care outdoors. Plan for regular maintenance.
How to decide fast:
Stand at your entry at 3–5 pm. If the sun hits hard, pick fiberglass or a light colour on steel.
If your entry gets wind-driven rain, specify a composite frame, quality weatherstripping, and a sloped sill.
If you live near a busy street, ask for Low-E or triple-pane glass to cut heat loss and noise.
Ask your consultant to note sun, shade, and wind in the measure report. A few minutes here prevents hot surfaces, paint issues, and seal problems later.
Mistake 3: Ignoring the frame, sill, and weatherstripping
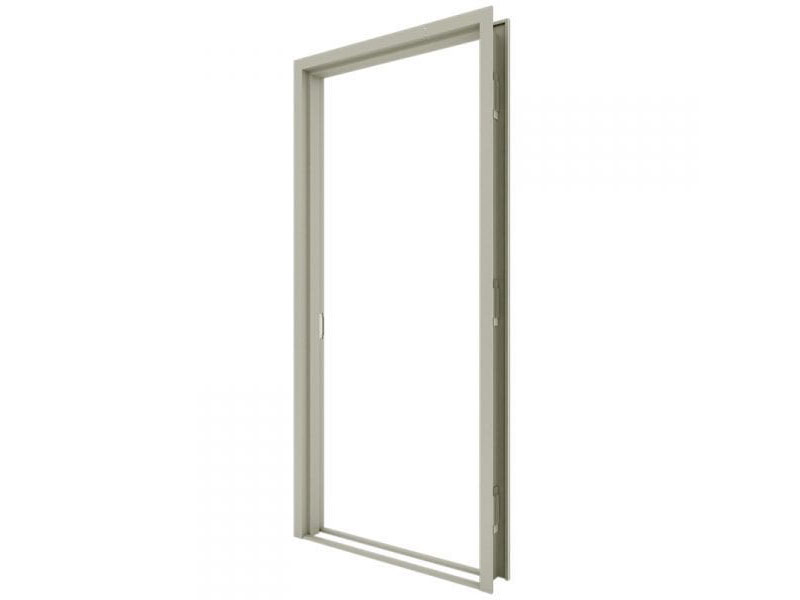
Many people focus on the slab only. The frame and sill do the quiet work. They keep water out. They keep air in. They help the door feel solid.
What to specify:
Composite frame. It resists rot. It does not swell in wet seasons.
Adjustable sill. It lets the installer fine tune the seal.
Quality weatherstripping. It should touch the slab all around with light pressure.
Proper sweep. The bottom seal should kiss the sill, not drag.
Foam and sealant. Use low-expansion foam and exterior-grade sealant at the perimeter.
Quick checks on install day:
Close the door on a sheet of paper. Tug it. It should hold with light resistance.
Shine a flashlight at night. No light should pass around the slab.
Run your hand around the frame on a windy day. You should not feel drafts.
Why it matters in Toronto:
Freeze and thaw test weak seals.
Driving rain finds gaps at sills.
A tight seal can cut heat loss and street noise. That saves energy and makes the home calmer.
Mistake 4: Picking glass for looks only
Glass changes how a door feels. It also changes privacy, light, and lead time. Picking by looks only can cause regret.
Decide these items first:
Privacy level. Clear, satin, textured, or decorative. Street-facing entries often need privacy.
Energy. Ask for Low E coatings. Consider triple pane if noise is a problem.
Safety. Tempered or laminated glass is stronger and safer. Laminated also dampens sound.
Lead time. Decorative sets and custom patterns can add one to two weeks.
Simple benchmarks:
Satin or frosted glass lets in light while blocking views.
Textured glass patterns vary. Ask to see a sample in daylight.
Large lites bring in more light. They also show more heat gain on west entries. Use light colours and Low E to manage that.
Tip:
Stand outside at night with interior lights on. That is the true privacy test. If you can see in, consider a higher privacy level.
Mistake 5: Deciding hardware too late
Hardware choices affect factory prep. If you pick late, you can delay the order. Some items need exact bore sizes and backsets.
Choose these before final measure:
Lock type. Standard deadbolt or multipoint. Multipoint locks secure the top and bottom. They improve the seal.
Smart lock. Keypad, fingerprint, or app control. Check battery access and emergency key options.
Handle style. Pull bar or lever. Confirm the center-to-center spacing if using a pull bar.
Hinge colour and finish. Match or coordinate with the handle set.
Door viewer and strikes. Add now if you want them cleanly integrated.
Why it matters:
Multipoint systems need factory machining.
Smart locks need correct hole sizes and spacing.
Changing later can mean extra cost and time.
Fast way to decide:
Pick the finish first. Black, stainless, brass, or bronze.
Pick the function second. Smart or standard.
Pick the form last. Lever, knob, or pull bar.
Ask your consultant to add all model numbers to the quote so the shop can prep it right.
Mistake 6: Underestimating finishing and colour choices
Finish affects look, lifespan, and lead time. Colour also changes how hot a door gets in the sun.
What to decide early:
Paint or stain. Paint gives solid colour. Stain shows texture.
One colour or two tone. Many homes use dark outside and white inside.
Sheen. Satin hides marks better than gloss.
UV stability. Ask for UV-stable systems, especially for west exposure.
Heat and colour facts:
Dark colours absorb more heat. On west entries they can run very warm.
High heat can stress any skin. Fiberglass handles heat better than steel.
Light colours reduce heat gain. Even a medium tone can help.
Time and cost impact:
Factory finishing adds days. Two tone adds a few more.
Touch-up kits are small. Order one with the door.
If you plan to repaint later, confirm the correct prep steps.
Smart checks:
Look at a real sample outside at noon and again at 5 pm.
Hold the sample near brick or siding to see true contrast.
Ask for the exact paint or stain code in your paperwork.
Mistake 7: Forgetting code, condo, or heritage rules
Rules can change your options. They can also delay a project if you ignore them.
Permits:
The same opening usually needs no permit.
Changing size or moving the door can need a permit.
Always ask if you are unsure.
Condos:
Corridor doors are often a common element.
Boards may control colour, panel style, and hardware.
You must book the elevator and loading zone.
Add two to five days for approvals and booking.
Heritage homes and districts:
You may need approval to change a door or glass style.
The city can ask for details on the street face.
Start this check early. It avoids rush changes at the end.
Fast path:
Send your installer a copy of any condo or HOA rules.
If you think your home is heritage, share the address at the consult.
Ask for all needed letters on company letterhead for boards.
Mistake 8: Not budgeting for add-ons
People plan for the slab and frame. They forget small items that add up.
Common adds and typical amounts:
Sidelite or transom: adds parts and glass. Plan $700 to $1,800 each.
Decorative or privacy glass: plan $300 to $1,200 more per unit.
Multipoint lock: plan $250 to $600 plus prep.
Smart lock: plan $250 to $450.
Two tone finish: plan $200 to $500.
Aluminum capping and interior casing: plan $200 to $600.
Frame repair or reframing: plan $200 to $800 if needed.
Old door disposal: often included. If not, plan $100 to $200.
Hidden items to confirm:
Removal and disposal included.
Touch-up kit included.
Caulking and foam included.
Paintable interior casing included or not.
How to control extras:
Ask for a line-item quote.
Share clear photos of your entry and trim.
Decide privacy level and hardware before final measure.
Keep a small contingency. A simple 5 to 10 percent buffer is wise.
Mistake 9: Poor timing and unrealistic deadlines
Custom work needs time. Rushing creates stress and changes orders.
What to expect:
Lead time: usually 4 to 8 weeks after final approval.
Design and quote: 3 to 7 days for drawings and pricing.
Install day: half a day to one day for a standard entry.
Seasonal pressure:
Spring and fall book fast.
Holidays and long weekends reduce factory days.
Specialty glass and oversized builds can add 1 to 2 weeks.
How to stay on track:
Book the measure early.
Approve the design and hardware on the first pass.
If you are in a condo, reserve the elevator early.
Add a one week buffer if you have a firm event date.
Mistake 10: Skipping after-care
A good install still needs simple care. Small tasks protect performance.
Do this in the first month:
Keep the threshold clean. Grit wears the bottom sweep.
Wipe weatherstrips with a damp cloth. It helps the seal.
Watch the latch. If it changes, call for a quick tweak.
Do this once a year:
Lubricate hinges with light oil.
Check exterior caulking and touch up as needed.
Wash the finish with mild soap and water.
When to call:
If you feel a new draft.
If the lock stands proud or binds.
If glass fogs between panes.
Most service visits are quick. Early calls prevent wear.
Cost basics to keep in mind
Here are simple starting points for typical GTA projects. These help with planning.
Steel single entry: from $2,500 installed
Fiberglass single entry: from $2,600 installed
Single with one sidelite: from $3,900 installed
Double entry: from $3,900 installed
Common add-ons:
Sidelite or transom: add $700 to $1,800 each
Decorative or privacy glass: add $300 to $1,200
Multipoint lock: add $250 to $600
Smart lock: add $250 to $450
Two tone finish: add $200 to $500
Capping and interior casing: add $200 to $600
Frame repair: add $200 to $800 if needed
Time basics:
Design and quote: 3 to 7 days
Fabrication: 4 to 8 weeks after approval
Install: half a day to one day
Tip:
Lock your choices before final measure.
Ask for a written scope that lists removal, disposal, trim, caulking, and touch-up kit.
Keep a 5 to 10 percent contingency for surprises.