What to Expect on Door Replacement Day in Toronto
A smooth install day starts before we arrive. Last month in East York, a family cleared a straight path, moved a console table, and took five minutes to review hardware with me.
We finished a single prehung door with a sidelite in under six hours. No surprises. Tight seal on the first close.
This guide keeps things simple. I’ll show you the flow of the day, how long each step usually takes, and what you can do to help. I’ll also explain a few terms so you’ll be not guessing. The goal is a clean fit, no drafts, and a tidy site by day’s end.
Quick suggestions:
Clear 1 metre of space on both sides of the door.
Crate pets and silence alarm contacts.
In winter, place an extra mat inside to protect floors.
Have your handle set and keys ready. If you choose a smart lock, keep fresh batteries handy.
At-a-Glance Timeline
Here’s the typical flow for a Toronto home. Times vary with glass, sidelites, and site conditions.
Arrival & walkthrough (15–30 min). Meet the lead installer. Confirm swing, color, hardware, and scope. Protect floors.
Remove old door & frame (30–60 min). Door off. Frame out. Quick check for rot or water stains.
Prep opening & sill pan (30–45 min). Measure, square, and flash the sill so water can’t sneak in.
Set new unit: plumb/level/shim (45–90 min). Dry fit. Adjust until reveals are even (about 3–4 mm).
Anchor, foam, flash, seal (45–75 min). Fasten into structure, not just brick. Low-expansion foam around the frame. Exterior seal where needed.
Hardware & multi-point lock (30–45 min). Install handle set. Set latch throw. Program smart lock if selected.
Interior/exterior trim & caulk (45–90 min). Clean lines. Touch-ups. In cold weather, sealants cure slower.
Cleanup & final walkthrough (15–30 min). Vacuum. Haul away debris if included. Test close, latch, sweep, and keys.
Typical total time:
Single prehung: 3–6 hours
Door + sidelite(s): 5–8 hours
Double or pivot: 6–9+ hours
Plan your day with a little buffer. Installations can uncover hidden issues (like a soft sill). Having an extra hour in your schedule reduces stress.
One Week Before: Final Check

Walk through the order details with us (or your installer). Small clarifications now save time later.
Swing and handing. Stand inside your home. If hinges are on the left and the door swings in, it’s a left-hand inswing.
Color and glass. Confirm paint/stain code and glass texture (clear, frosted, reeded).
Hardware. Handle style, finish, and whether you chose a multi-point lock (more secure and tighter seal).
Threshold height. Check that your winter mat will clear the sweep.
Size. Typical doors are 36" × 80" (915 × 2032 mm). Older brick openings can vary. Custom sizes are common in Toronto.
Condo or townhouse? Book the elevator and confirm work hours. Downtown installs often need a parking spot within 15–20 metres of the entry.
The Day Before: Homeowner Prep
Ten minutes of prep makes the day smoother.
Clear a 1 m path from driveway to door and 1 m inside the hall.
Move console tables, shoe racks, wall frames, and plants.
Silence or remove the alarm contact on the old door (call your alarm company if needed).
Put pets in a safe room.
In winter, place an extra mat and a towel near the entry.
Have your new handle set, keys, and smart lock batteries ready. If you’re keeping the old door or hardware, set aside a labelled spot.
Arrival & Protection
We start with a quick hello and a two-minute scope review. We confirm swing, color, glass, and hardware again. Then we protect your home.
Floor runners in the hall and on stairs.
Dust sheets around the work zone.
Exterior protection if we’re cutting old trim.
Photos of the existing condition for records.
We set tools outside if weather allows. Noise is normal during removal and trimming, but it comes in short bursts.
Removal of Old Unit
We remove the slab first, then the old frame. We cut old fasteners, ease the jambs out, and keep brick and interior walls clean.
We inspect the sill and side jambs for soft spots or water staining.
We check the rough opening for square and level.
If we find minor rot, we review a simple repair plan before proceeding.
Expect some sound during this step. Dust stays low because we cut carefully and use vacuums.
Why we inspect now: a tight, draft-free door needs a sound base. If the sill is soft or the opening is out of square, the new door can bind later.
Opening Prep (Where Good Installs Win)
This step decides how tight and quiet your new door will feel. We slow down here on purpose.
Measure and square. We check width, height, and diagonals. A square opening stops future binding.
Sill pan or flashing. We install a pan or layered flashing so any water goes out, not under your floor. A slight outward slope helps (about 3–4 mm over the sill depth).
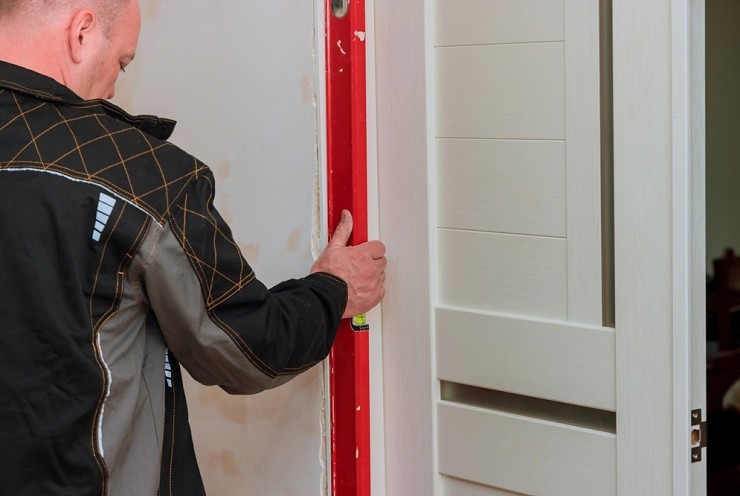
Check level and plumb. The sill must be level; the hinge side must be plumb. Good doors start straight.
Dry fit. We set the unit in, confirm reveals, then pull it back out to adjust.
Plan the shim points. Hinge and strike areas take most of the load. We pre-place shims there.
Gap strategy. We aim for a 6–12 mm (¼–½") gap around the frame. That gives room for foam and fine tuning.
Older Toronto brick may not be perfect. Small masonry shims and careful trimming are normal.
Setting the New Door
Now we set the prehung unit for keeps.
Place and pin. We set the unit, pin the hinge side first, and re-check plumb/level.
Shim smartly. Tight, paired shims at hinges and strikes. Even pressure. No bowing.
Anchor into structure. We use structural screws into studs or masonry anchors into the framed return, not just brick. Typical screws are 75-90 mm (3-3½").
Reveal check. Consistent 3 - 4 mm gap between slab and frame on all sides. The latch hits the strike cleanly.
Swing test. We open/close several times. We test with your winter mat in place.
Threshold set. We adjust the threshold height so the sweep kisses the sill without dragging.
If the opening is slightly out of square, hinge shims and strike tweaks fix it.
Toronto tip: Exposed entries benefit from a drip cap or an extra sweep. It sheds meltwater before it reaches the threshold.
Air-Seal & Weatherproofing
Comfort and energy savings come from the seal, not just the slab.
Low-expansion foam. We use “window & door” foam so it won’t bow the frame. Two light passes seal better than one heavy pass.
Don’t block weep paths. Any glass units or sills with weep holes must stay clear.
Interior air seal. Foam + a neat interior caulk line stops drafts and dust.
Exterior water seal. Flashing tape at critical joints and a smooth exterior sealant bead keep wind-driven rain out.
Threshold seal. We bed the sill on sealant and check for a continuous bond.
In older homes, most “cold door” complaints are air leakage, not R-value. A tight install can cut air leakage at the entry by 50–80% versus a tired frame and sweep.
Cold day install? Sealants and foam cure slower. We factor that into timing.
Hardware, Locks & Smart Options
This is the part you touch every day. It should feel solid.
Handle set. We confirm backset (typically 2⅜" or 2¾") and height. Holes are clean and aligned.
Multi-point lock (if chosen). Hooks or bolts engage at top, middle, and bottom. This tightens the seal and improves security. You’ll feel the difference when you lift the handle.
Strike reinforcement. We use long screws (≥ 75 mm / 3") into framing at the strike and hinges. This resists kick-ins and keeps alignment.
Smart lock setup. We install, pair, and test. Bluetooth or Wi-Fi models get a quick walkthrough. Batteries go in fresh.
Smooth throw. The deadbolt should extend fully without forcing. If not, we adjust the strike and weatherstrip compression.
Multi-point locks can reduce door bow and improve perimeter compression, which means fewer drafts over time.
Trim, Capping & Finishing
This is where the entry starts to look “finished.”
Interior trim. We set new casing tight to the wall. Nail holes are filled. Joints are caulked for a clean line. If you’re keeping old trim, we re-fit it and touch up.
Exterior capping. On many Toronto homes, we wrap exterior wood with aluminum or PVC capping. It protects against rain and slush and cuts maintenance. Seams are tight. Drip edges shed water away from brick.
Caulk lines. Smooth, continuous beads at inside corners and exterior seams. Color matches the trim or brickmould.
Finish touch-ups. We remove protective film after caulking. We wipe the slab and hardware. We adjust the sweep so it kisses the threshold without dragging.
Weather note: Sealants cure slower in cold. At ~20°C most exterior sealants skin in 20–60 minutes and cure in 24–48 hours. Near 0–5°C, curing can take longer. We choose cold-rated products when needed.
Cleanup & Disposal
We leave the entry ready to use.
Site cleanup. We vacuum the hall and threshold area. We sweep the porch. We bag offcuts and packaging.
Magnet sweep. We run a magnetic roller outside to catch stray screws or nails.
Old door removal. If haul-away is included, we load the old slab and frame. Steel doors go to metal recycling. If you’re keeping it, we stage it neatly where you want.
Leftovers for you. We leave extra touch-up caulk (if supplied), spare screws for hinges/strike, and any color codes. You get all keys and smart-lock backup codes.
A tidy crew usually adds only 10–20 minutes at the end, but it prevents scratched floors and lost screws later.
Aftercare: First 48 Hours & First 90 Days
Your door will “settle in.” A few light checks keep it perfect.
First 48 hours
Let sealants cure. Avoid washing the exterior caulk line. Most cold-rated sealants skin in under an hour but can take 24-48 hours to cure in cool weather.
Operate gently. Close the door with light hand pressure. Foam and weatherstrip are still setting.
Watch the sweep. If it drags on your mat, slide the mat back for a day. We want the sweep to kiss the threshold, not scrape.
Check the smart lock. Confirm codes work. Keep fresh batteries nearby.
Moisture check. Wipe any condensation that appears on glass. It’s normal as indoor humidity shifts.
First 90 days
Snug the screws. Seasonal movement can loosen hinge and strike screws. Use a hand screwdriver to snug them, no power drivers.
Re-test the latch. The door should latch with light pressure. If you need to push, adjust the strike plate 1-2 mm.
Weatherstrip set. A faint “click” sound can happen as the new weatherstrip compresses. It fades as it forms to the slab.
Finish care. Clean with a soft cloth and mild soap. No solvents. Dark colors in west sun may run warmer; that’s normal.
Humidity matters. Aim for 35-50% RH indoors. Stable humidity reduces seasonal swelling and keeps hardware smooth.
Warranty & Documentation
Good records make future service simple.
Register and file
Product warranty. Register the slab and glass within the maker’s window (often 30–60 days).
Install warranty. Save your invoice and the written install warranty terms.
Keep these details together:
Door model and size
Color/stain code and sheen
Glass type/texture (e.g., satin-etch, micro-reed, laminated)
Hardware brand/model, finish, key code
Lock type (single-point or multi-point)
What warranties usually cover
Slab/skin defects (warping limits vary by brand).
Insulated glass seal failure (fogging between panes).
Factory finish adhesion for a set period.
Installation workmanship for a defined term.
What they often exclude
Damage from unsealed wood, misuse, or unapproved cleaners.
Scratches from abrasive pads.
Caulk/paint touch-ups beyond normal finishing.
How to get fast service
Take straight-on photos of the issue and a close-up.
Note the date, weather, and what you observe (e.g., “latch sticks when below 0°C”).
Share your saved model/finish codes with support.